Showing posts with label diy. Show all posts

September 28, 2015

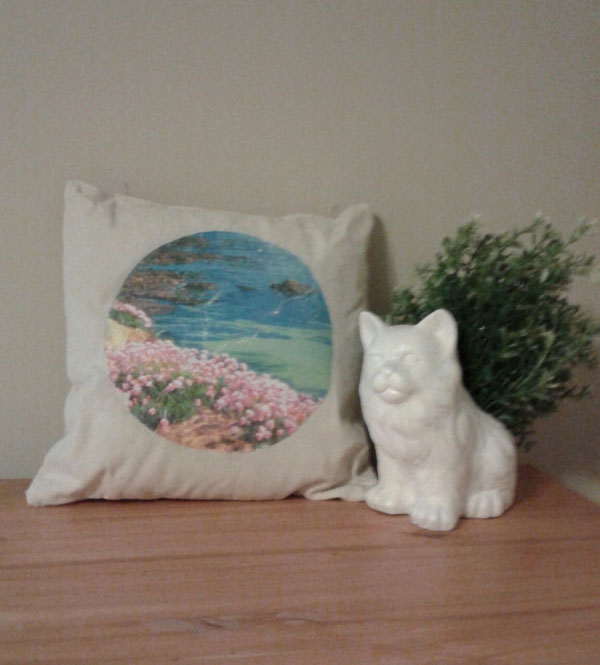
D.I.Y || Photo to Fabric Throw Pillow


|| What You Need ||

Blank Canvas Pillow or Pillow Case 
I got this mini pillow at Target for $3
Mod Podge Photo Transfer Medium
Foam Brush
Image
Spray Bottle with Water

1. With the foam brush you want to put a layer of the medium on the image making sure you cover it until you no longer see the image. Place the side with the medium on the canvas making sure to get rid of an excess from the sides and press firmly. I used an image from an old calendar I had, hence the numbers, but you want to make sure the image has the medium and is on top of the fabric.

2. Allow it to sit for 24 hours!! This is very important as to let it completely dry. When it's time spray the image lightly with the spray bottle and rub until the paper starts to peel. Be careful not to rub it in the same area because it'll start to peel away the image too.

Once you're done wipe and  voila!! A cute decorative pillow.  

Also bonus: The pillow is suppose to be the gold glittery polka-dots but I just thought it'd look cute to use it as a reversible throw pillow :)

Wondering about that adorable cat planter? There is a simply DIY for it right here.

September 17, 2015

D.I.Y | Before and After Bambo Nightstand

My wonderful friends gave me this nightstand when I first moved out of my own and I had been meaning to paint it ever since but I had trouble figuring out what exactly I wanted.


Since my bed frame and lamp is already white I wanted something with color that would also go with my dark blue bedspread. As usual I Pinterested my heart out and finally decided on red.

I always check for mismatched paint and lucky for me they had a red paint very close to what I wanted. I only needed to purchase another sample paint color to have enough. I mixed the two together and though I was getting worried it looked more pinkish it did darken up some after drying.

There you have it! For less than $5 in paint and spraying the handles with metallic spray I already had I updated a free dresser. I say that's a win!


September 10, 2015

D.I.Y | Faux Chalkboard Planner

Since coming back on the blog scene I needed something to write down ideas and just keep my thoughts organized. As much as I want a real fancy planner that isn't in my budget so instead I let the crafter in me take over! It's real easily and cost less than a high end planner.

|| What You Need ||
Blank Front Planner 
Printed Inspirational Quote 
Stickers (Used as tabs)
Permanent White Pen  
Pencil
Mod Podge (optional)

1. You want to flip over the paper with the inspirational quote and rub the area where the words and images are with the pencil.

2. Lay the paper with the shaded back on top of the planner where you want the design to go. Then take the pencil and trace over the lettering. Be very careful not to move the paper around.

3. It will be faint but there should be an outline that you can trace over with the white permanent pen.
  
4. Allow to dry and feel free to do a layer of Mod Podge to include a little label at the bottom which I just printed from my computer.

5. For tabs just simply take the stickers and fold over the edge making sure it can be seen when shut. 

|| FREE STUFF ||

I wasn't sure what I wanted on the front of my planner so I did a few ideas that you're free to print for your own Faux Chalkboard Planner or other DIY projects!!

September 1, 2015

D.I.Y | Antique Jar

My mother has this neat antique looking jar sitting on a vanity that she keeps hair ties and pins. She got it long ago and I wanted to create something similar for myself!


|| What You Need ||

Small jar 
Metallic Finish Spray Paint
Printed Antique Style Image
Mod Podge
Foam Brush

  1. Find an image! I used one of an old map of Paris that I found at Remodelaholic for mine.
  2. Use the lid to trace around the image you want on top of the jar. Trim the edges until you get it to fit the smaller inner circle.
  3. Spray the lid with the metallic paint and allow to dry.
  4. To attach the image use the foam brush to apply Mod Podge then place image on top and apply another layer of Mod Podge of the image. 
  5. Once it dries you're ready to use it for anything. Store hair ties or use it for homemade scrubs!

October 13, 2011

D.I.Y | Mini Pompadour


(I couldn't resist posting Johnny Depp as Cry Baby)

I've really been wanting to do some sort of hair tutorial so I thought I'd share my way to do a mini pompadour. It's perfect for those days you don't have time to wash your hair or if you want some awesome volume. I have bangs now that I just push to the side but I have done this before with shorter bangs just the puff isn't as tall.
 *Note: I was trying to take pictures while doing my hair plus it was late so ignore my tired face and awkward photo angles.

Supplies:
  • Hair brush
  • Plastic Hair Comb
  • Bobby Pins
  • Hairspray
  • Hair Putty (if your hair is clean run a little bit through bangs)
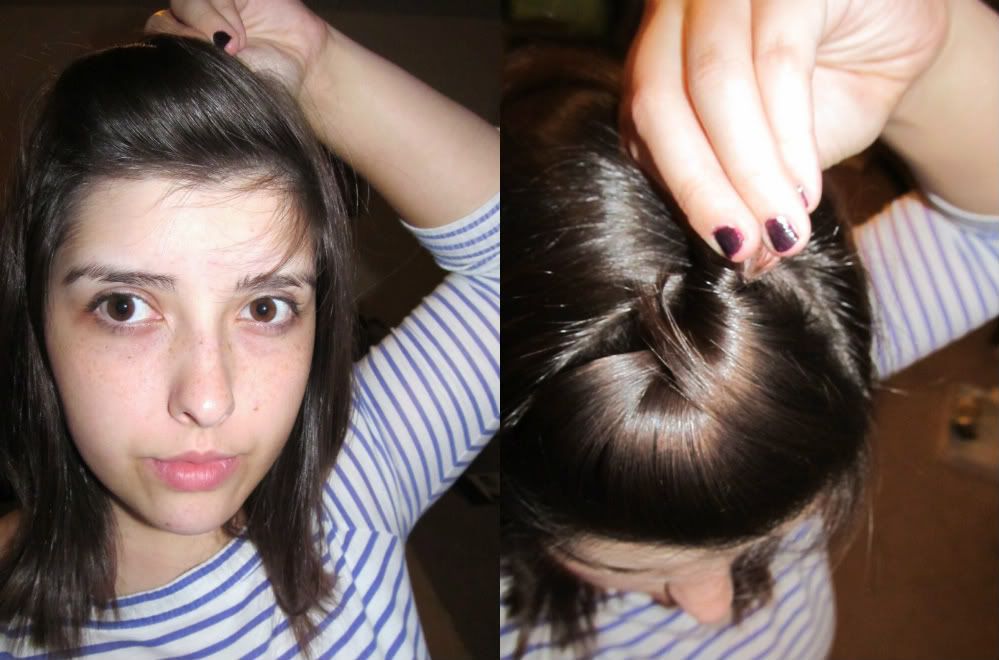
Step 1: Take a portion of your bangs and little bit of hair to create a small pony tail.
Step 2: Take the pony tail and twist it.
Step 3: After you have twisted the pony tail lay it down and don't let go of the pony tail.
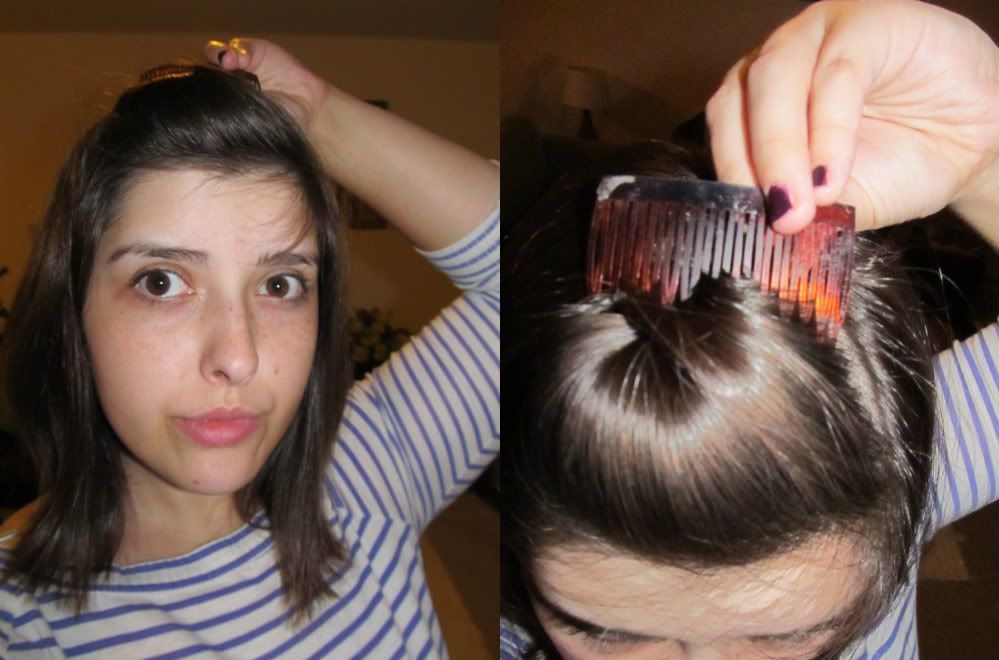
Step 4: While still holding the pony tail down take the comb with your free hand and press it in. I like to gently push the pony tail then put the comb right behind the twisted part of the hair.
Step 5: If the pompadour isn't how you would like it just grab the pony tail piece and redo it.
Step 6: Once you have it like you want it take a bobby pin and put it on the extra hair left over from the pony tail. This helps keep the extra hair stay in place and not fall to one side.
Step 7: Spray all  over to keep everything in place.

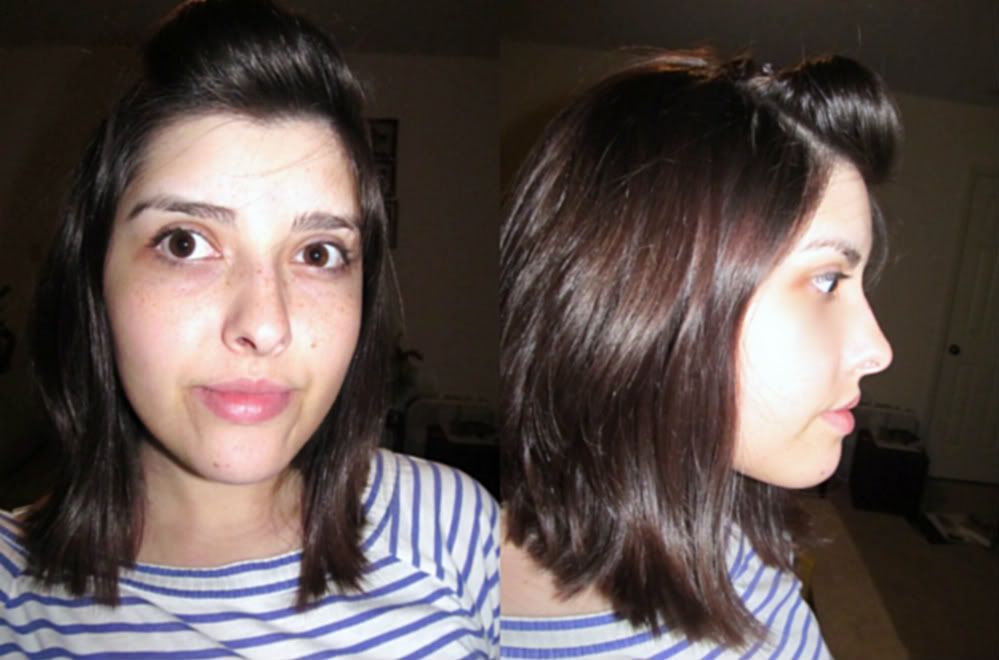
There you have it the mini pompadour! Just a helpful tip is during the day make sure to just push the comb every now an again. It won't come out but it keeps the pompadour from going flat!


October 9, 2011

D.I.Y | Jewelry Display

I'm taking part in my first craft show at a Christmas Craft Show this November and wanted something to display some of my necklaces. I looked in different stores but either I couldn't find the style I wanted or the style I wanted was way too much. I finally decided I was going to make my own and though it was a bit challenging the price of supplies was half the price of any fancy one at the store.
Supplies:
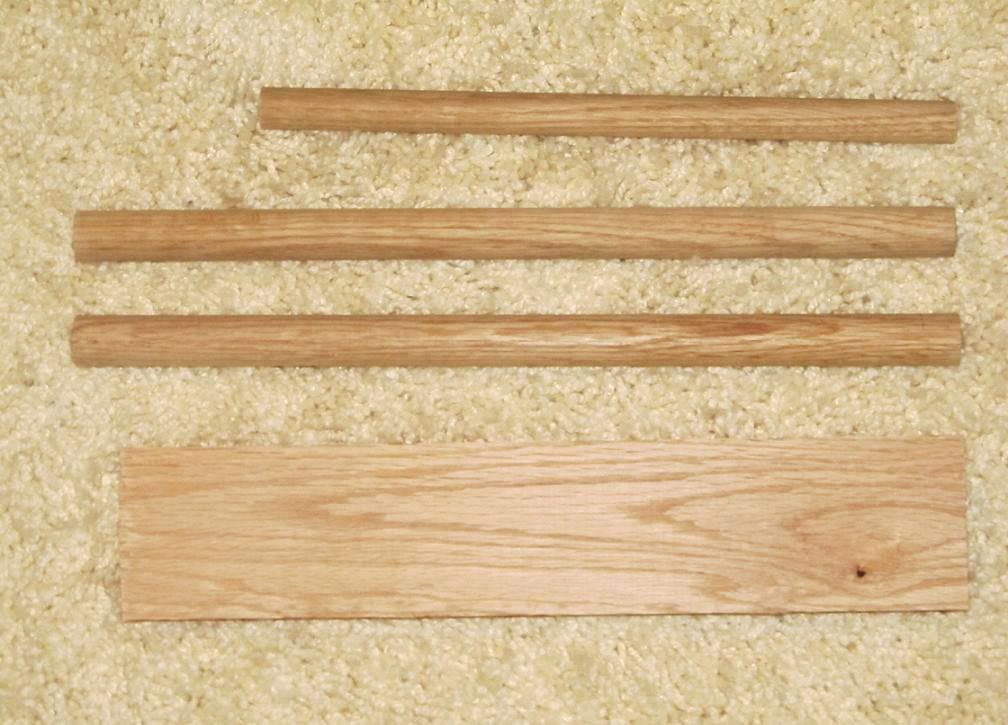
  • 1-5/8 36"- Dowel Rod (You'll need it cut into one 10" piece)
  • 1-3/4 36"- Dowel Rod (You'll need it cut into two 13" piece)
  • 1-1x3x2 Board (You'll need it cut into one 12" piece)
  • Water Based Wood Stain
  • Acrylic Paint 
  • Clear Gloss Spray Paint *optional
  • Masking/Painters Tape (preferably with the thinner width)
  • 2 Foam Paint Brushes
  • Ruler
  • 1 1/2" Wood Screws
  • Sandpaper

Tools:
  • Electric Drill- with drill bit and screw option
  • Screw Driver *optional
You'll want to go to the hardware store and pick up the two dowels and board. If the store offers wood cutting let them know what sizes you need or you can buy a hand saw and miter box to cut at home. I picked out oak wood because it's has a beautiful natural grain but it is really hard to drill and cut.  
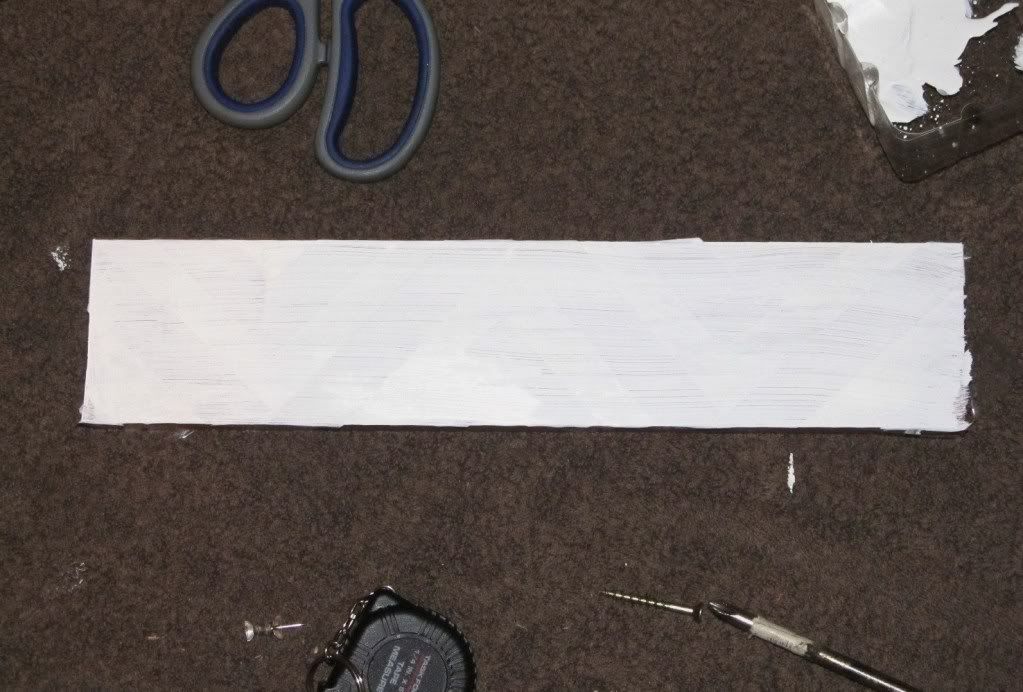
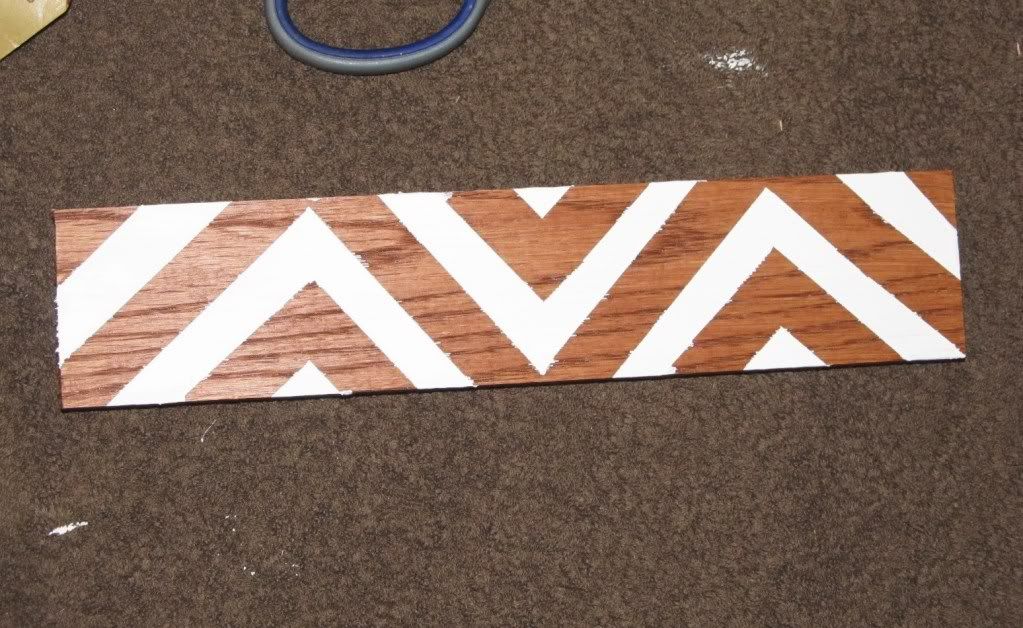
You'll want to go ahead and stain your wood dowels and board using the foam brush; let dry. Then take your masking or painters tape and tape out a zig zag or another pattern on the wood base. 
Take the other foam brush and paint over the top of the board and let dry. It took me about two coats of white to get the brightness I wanted.
Now here comes the math and measurement part.
You'll want to mark where you'll drill the holes in the dowels and where on the board you'll place them. You'll need to mark both entries and make sure everything lines up, it's kind of like doing a dry standing of what it's going to look like. I was in such a rush to get it done and didn't do as great of a job marking and measuring which made it take much longer to finish.
Once you finished this take your drill bit and drill the holes for your screws. Make sure you don't make it too big or too small for the wood screws. 
I found it easier to start with the base board and screw the 13" dowels into place. Then take the center piece and screw in each side. 
If you want a glossy finish use the clear gloss spray and let dry. 
There you have it! Your own jewelry display where you can show case your necklaces and jewelry.

Also I'm trying to save up for this Christmas Craft Show so I can buy supplies for jewelry and packaging. I had a enough to kind of kick start buying supplies for holiday pieces and packaging but I still need to purchase a few more items to make necklaces and also boxes to put jewelry in for customers. With that said all proceeds from Craft'n Bettie will go to help my efforts  :)

-Amber

September 9, 2011

D.I.Y | Television Stand


I found this displaying a tacky lamp in the local thrift store for only $10. At first I just changed the knobs, cleaned it then used it as an "entry way" table.
It worked at the entry way but we still put our junk on the old television stand. So I decided to re-purpose it  and put chalkboard paint to the front. we've already had an epic tic-tac-toe game on it
There is still a lot of work to be done to it on the outside and inside. It's a little rough on the outside so new staining is in order then I want to put a shelf inside for more storage and to put the game system inside (and drill some holes in the back for cords). I think it looks great so far and once we get rid of the speakers and do the small things it'll be done!

p.s: Yes I was watching Doctor Who when I took the picture.

-Amber
August 4, 2011

D.I.Y | Trial and Tribulations of a Cat Planter

 Sometimes the simple projects you have planned don't turn out right. For example this cat planter I was going use to store my pens and pencils in. 

As cute as the cat was it was fading in little places with minor scratches
 
So the first time I did a light spay to cover the black and hours later did another. I was thinking it looked pretty good until... 
It started drying in these little wiggle lines. After it dried I took sandpaper hoping it'd help but it was a high grit so it didn't feather out like I wanted too. When  I went to respray it started doing the same thing again.

I'm not going to toss the project but this means I have to buy some smaller grit sandpaper and new spray paint or suck it up and do it in a white matte finish. I hate when this happens but sometimes projects fail :(

-Amber
December 24, 2010

D.I.Y | Ikea Dresser

I seen this amazing before and after of this Ikea Rast Dresser that I had to try out. It wasn't hard but it would have been a whole lot easier if I had just finished it all on  day it was sunny instead of trying to wait the rain out. Here is what I have so far.
I used white high gloss pant on the front of the dresser, and stained it with antique walnut with polyurethane included on the sides. I traded out the wooden nobs with silver ones. I didn't get the stain as dark as I wanted it, but I can always try again later. After everything the cost for this dresser was around $50. I thought about getting another one and putting them side by side to make it look like a 6 piece dresser but that's another day and another project :)
Have a before and after you'd like to share? Send it to me at: amberupbeat@aol.com
with the title of "Before and After" and I'll post it on the site.

LinkWithin

Related Posts Plugin for WordPress, Blogger...