Showing posts with label food and beverage. Show all posts

August 21, 2013

Recipes | Very Veggie Potato Soup

As the title entails it is a lot of vegetables and it is absolutely delicious! I tried to make it healthy but since I was using leftovers and what I had on hand I think it could use some tweaking to make it healthier. Until next time this is how you make this easy soup.

  • 1 Small Package of Frozen Mixed Vegetables ( I used the "California Blend")
  • 4-5 Small Red Potatoes
  • 1 Can Cream of Mushroom Soup
  • 1/4 Cup Sour Cream
  • 2 Teaspoons Paprika
  • 2 Garlic Cloves
  • To Taste Salt/Pepper 


  1. First off you want to peel those potatoes and get them in boiling water to soften up just a little (about 10-15 minutes) meanwhile you want to soften up the frozen mixed vegetables.
  2. Once the potatoes are soft but still firm put them in the food processor or blender along with the mixed vegetables, peeled garlic cloves. Puree everything then add in the Cream of Mushroom, and continue to puree until you get the texture you want (some people like it a little chunky while others may like it smoother.) 
  3. Put the puree in a saucepan on medium low, add in your spices and allow it to cook for about five minutes.
  4. Turn it down to low heat and stir in 1/4 cup of sour cream.
  5. Scoop it into a big bowl with low-fat cheese and a little hot sauce if desired and as always enjoy!
Like I said I used what I had on hand so next time I might change it a bit. Maybe try a low sodium chicken broth rather than the Cream of Mushroom and just add in fresh mushrooms. Also replacing the sour cream with a low-fat variation or even try greek/regular low fat plain yogurt instead. It's definitely something I want to try again especially with Fall around the corner :)


July 14, 2013

Recipes | Grilled Ranch Zucchini

One thing I love about Summer is fresh vegetables from my Grandpa's garden. A few weeks ago he sent me home with huge a zucchini squash that I had no idea what to do with. Luckily my Mom was nearby and mentioned a great recipe that she makes all the time! It's easy, delicious, and did I mention affordable?


What You'll Need:
  • Zucchini Squash
  • Ranch Dressing Packet
  • Sheet Tray
  • Grill (Outdoor or Indoor)

  1. Clean zucchini and cut off the narrow part of the squash. Take the thicker half and slice 1/2" pieces. Take the narrow piece and cut lengthwise to get long strips.
    *This way you use the whole squash and don't have to worry about small pieces falling between the grill.
  2. Lay out zucchini pieces and sprinkle both sides with the ranch packet.
  3. Leave on the grill for about 2-3  minutes then flip; if there isn't any grill marks leave it for a few minutes longer.
  4. Once the other side is done you're ready to eat!

We paired our ranch zucchini with a pasta and cheese sauce, but it's perfect as just a side dish too!


June 17, 2013

Recipes | Passion-Apple Tea

At the end of the term my friend and I discovered this secret drink after hearing someone order it at Starbucks. It was fantastic and it was all we ordered until the end of school. Basically it was their Passion fruit lemonade with apple juice instead of lemonade, so I was on the look out for the passion fruit tea. I finally found it and it taste exactly like the original :)

What You'll Need:
  • Tazo Iced Passion Herbal Infusion
  • Quart (32 oz.)Boiling Water
  • Quart (or more) Apple Juice
  • Simple Syrup* (optional)


  1. The instructions are rather easy for the tea, take the boiling water into a heat safe pitcher and drop the packet in, allow to steep for 5 minutes. 
  2. Pour a little over a quart of apple juice into the mixture (feel free to adjust to your liking) and there you go!
  3. I think the sugar in the apple juice is plenty, but if you want it sweeter just adjust it by using simple syrup.
  4. Enjoy!


*Simple Syrup*
- Equal parts sugar and water-
  1. Place all ingredients into a pot and heat until the sugar water mixture begins to boil.
  2. Allow to cool before using.


April 15, 2013

Recipe | Ombre Cake


Saturday I got together at my BFF Desiree's house to do some baking.  She wanted to make a "thank you" cake for some friends that helped with a water heater in her and her fiance's new house. I always enjoy baking with her because we bounce ideas off each other to create something great. It was actually her fiance that mentioned different colors, though he was talking about the inside we decided we could do an ombre effect with the icing easier instead. She has the cutest KitchenAid mixer in pink and it is perfect for whipping homemade buttercream frosting; this is something I'm putting on my wedding registery. We found the perfect cake recipe on the back of the flour box and it made a soft and fluffy cake. I always think Swiss buttercream is the easiest to make so I whipped some of that up and added some vanilla extract for flavoring. We wanted to do purple, but had food coloring instead of the coloring gel so we couldn't get as an intense purple as we wanted. However, I loved the lavender color we did get and I think it transitioned nicely. I showed her how to do buttercream beading on top and she did a fantastic job doing the same on the bottom. She had some delicious sprinkles that tasted like crushed up rock candy so we filled the top with those. I had to leave before tasting it all together but from tasting the scraps plus the message she sent me; it was a hit!
This week I'll have plenty of cakes to work on in class. Today is wedding cake day, tomorrow is our practical cake and then Wednesday I'm doing my Tardis specialy cake. Out of all of them I think I'm more nervous about the Tardis cake because there is so little to prep and it has to be done all in one day. Well hope everyone has a good Monday and I'll post pictures of the cakes from class once they're all done!

April 1, 2013

Recipes | Chopped Challenge

Today in class we did our Chopped Challenge, where we were given  a "Mystery Basket", or really a note card with our ingredients, and we had to create a dessert. We had to include all items and some form of a foam or sabayon and meringue or fruit chip. Luckily we got first grab on Thursday and got to plan over the weekend. This is what me and my team member came up with:

"Mystery Basket" Items

  • Canned Peaches
  • Figs
  • Balsamic Vinegar
  • Instant Espresso 
  • Cream Cheese


What we created:
  • Cream cheese pound cake layers
  • Peach sabayon folded in whipped cream between layers
  • Fig fruit chips
  • Balsamic reduction with brown sugar
  • Espresso caviar (not really caviar but any puree or juice with some gelatin, dropped into cold oil to make it look like little caviar dots)
  • Topped with quenelle of whipped cream and sugar garnish

I was worried about the balsamic vinegar because it smelled strong but I have heard people roasting strawberries and other sweet fruit with the balsamic, plus adding the brown sugar helped cut the strong vinegar flavor. The cake layers were soaked with the syrup from the canned peaches which helped give the peach sabayon more flavor. The espresso caviar were a little bitter but reminded me of an Americano. Putting everything together tasted awesome because the elements helped each out. The balsamic reduction helped to cut the super sweet cream cheese pound cake, the whipped cream helped with the espresso caviar and the sabayon was just a nice cream accent to the cake. I would totally make this again and I had tons of fun with this challenge.

Have you ever seen the actual Chopped t.v show? What would you all make from these items?

October 26, 2012

Recipes | Warm Apple Cider for Two! from Of Corgis and Cocktails

applecider6

Hi there! I'm Katherine and I blog at Of Corgis and Cocktails where I talk about all things related to fashion, food, and fido. It's finally time for really yummy hot apple cider. I really quite enjoy a piping hot cocktail on a chilly fall night, especially since I haven't turned my heat on. So here's my little recipe for a serving for two for hot apple cider with rum.
applecider4

July 17, 2012

Recipes | Taco Bake

Some nights I get bored with the typical dinner ideas and do a "casserole challenge" where I try to make a casserole with what we have in the fridge. The other night I made this amazing taco bake from left overs and things I needed to use soon.


What you need:
  • 1-1/2 cups of pasta
  • 2-3 small green bell pepper chopped
  • 2 tomatoes diced
  • garlic minced
  • 1/2 cup Sour cream
  • 1 cup of shredded cheese
  • 1/4 cup salsa
  • tortilla chips
  • taco seasoning
  • 1/2 pound of beef (chicken or turkey can be used too)

  1. Preheat oven to 350F degrees
  2. Cook your pasta according to box and set aside for later.
  3. In a saucepan, saute your garlic, onion and peppers in a bit of oil until tender.
  4. Lower heat and add in tomatoes, salsa, 1/4 of your taco seasoning, sour cream and mix well. It may look a little soupy but don't worry.
  5. In another sauce pan cook your beef and add your taco seasoning. *Use a spoon while it cooks in the sauce pan to get a finer texture and to keep from getting big chunks of ground beef*
  6. Mix everything into the casserole dish and sprinkle with cheese.
  7. Let it bake for 15-20 minutes then let it settle. Serve with tortilla chips and a little bit of salsa, sour cream or guacamole.
  8. Enjoy! 

June 21, 2012

Recipes | Homemade Pickles


One thing I love about summer time is my grandpa's garden and making the home made pickles from the cucumbers. He would make some the traditional way in the mason jars but a couple he'd just cut up in vinegar with onions. It's really quick and simple snack that goes great with sandwiches.


What You'll Need:
  • Cucumbers
  • Distilled White Vinegar
  • Yellow Onion
  • Container or bowl
  • Plastic Wrap (if container doesn't have lid)

  1. Rinse off cucumbers; peel and cut into either slices or spears which ever you prefer.
  2. You'll only need about half of that onion; peel and chop.
  3. Put cucumbers and onions in container/bowl and pour vinegar till everything is covered.
  4. Wrap and put in refrigerator for a few hours then they're ready to eat. 


June 14, 2012

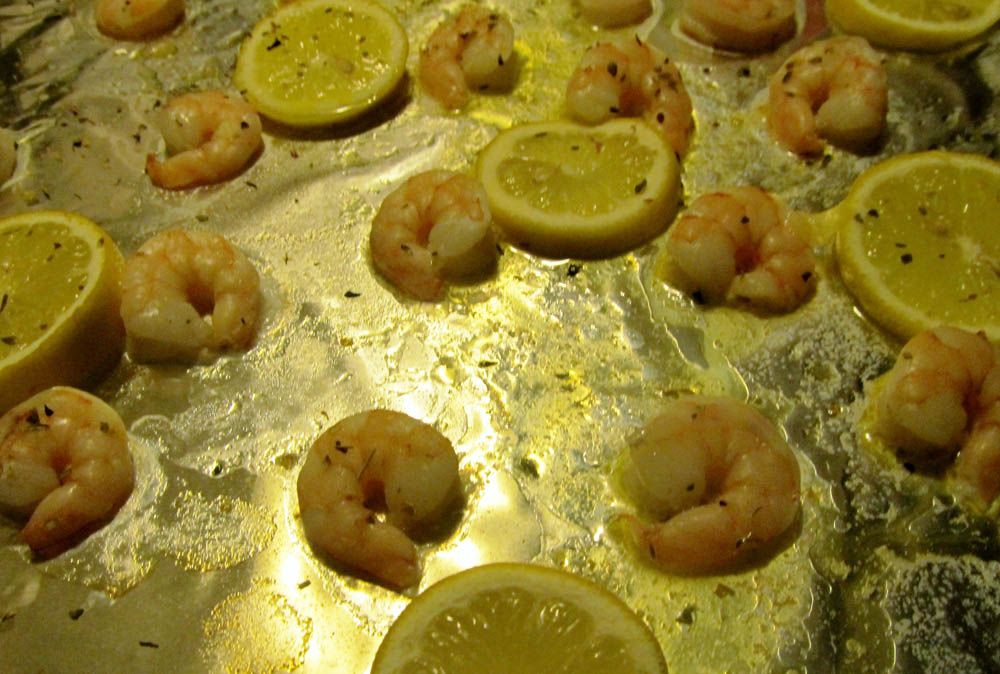
Recipes | Lemon Shrimp Bake


This recipe is perfect for a party or for salads and it is quick and easy! The best thing is you can flavor it up how ever you like it :)

What You'll Need:

  • 3 Lemons (two for slices and one for juice)
  • Raw Shrimp (detailed or with tail according to your preference)
  • Stick of butter (cut into pieces)
  • Seasoning of choice (I gave oregano a try on this one)
  • Aluminum foil
  • Baking pan

What to do:

  1. Preheat the oven to 350 degrees and line baking pan with aluminum foil.
  2. Slice up two lemons and put on pan along with raw shrimp and butter (cut into pieces.)
  3. Squirt with lemon juice and season all over.
  4. Place in the oven for 10-15 minutes.
  5. Enjoy!


June 7, 2012

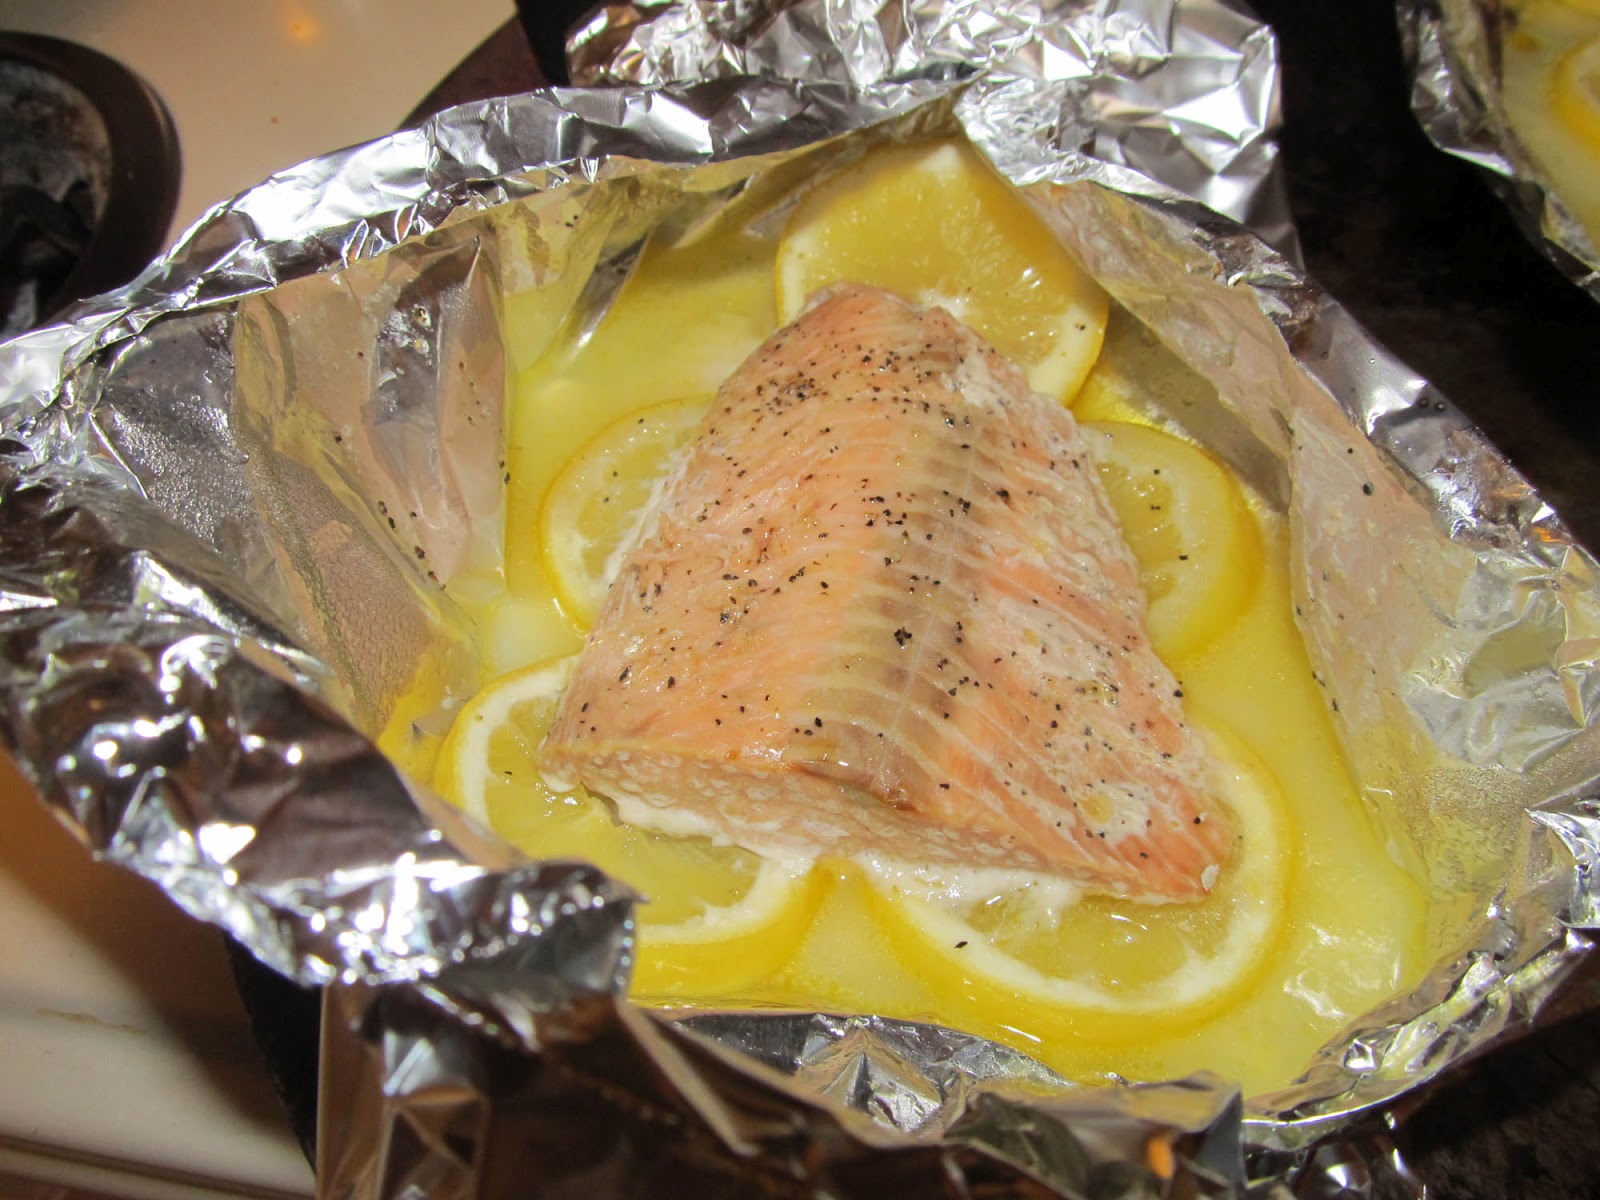
Recipes | Lemon Pepper Salmon

Can't you tell I love peas?

Like many of you I love Pinterest and it's infinite amount of recipe pins so of course I couldn't resist trying out this easy salmon recipe. I wanted to test out this recipe on my day off to see how "easy" it really was and I have to say it was right on!

What you'll need:
Directions:

  1. Thaw out your salmon; I bought them individually wrapped so they're easy to toss a few in a bowl on the bottom shelf of the fridge to thaw out while you're at work or during the day.
  2. While you're prepping preheat the oven to 300 degrees.
  3. Slice a couple of lemon "wheels" (if you like lemon with your fish cut few wedges for later.)
  4. On sheet of aluminum foil place enough lemon slices to cover the bottom of the salmon (it only took five.)
  5. Place a few pieces of butter on top of the salmon.
  6. Sprinkle pepper on top plus any other seasonings of choice.
  7. Create a pocket with the aluminum foil by pulling two sides together, fold over, then close the sides in with the center fold.
  8. Bake for 25 minutes until salmon flacks easily with a fork (internal temperature should be 145 F; place thermometer in the thickest part of salmon when checking)

It tasted great and clean up (including prep) was a breeze because everything was contained in the aluminum foil pocket. Next time though I might use a bit more pepper and another spice to give it additional flavor. Overall it's an easy tasty dinner perfect for two that you won't break a sweat over! 


May 31, 2012

Recipes | Easy Poached Egg

When I was in labs at school I had a class that for the first few days all we did was cook breakfast foods and poached eggs were on the list. They're rather easy once you get the hang of it but it's not a quick process. So I found this amazing recipe at The Kitchn on how to make one in the microwave! Perfect for in the morning or when you only have a microwave to cook with (i.e college dorms.)
What You'll Need:
  • 1 Egg
  • 1/3 Cup Water
  • 1/2 tsp vinegar (helps egg to coalesce better)
  • Microwavable cup (I used an extra large soup style mug)
  • Slotted Spoon
  1. Crack Egg into cup and pour water/vinegar mixture over top
  2. Set microwave power at 80% and cook for 60 seconds*
  3. Since microwaves are different keep cooking at 80% in intervals of 10-20 seconds 
  4. Once finished take remove the egg with the slotted spoon; the white will be a little wiggly but that's okay since the yoke will cook faster than the whites.
  5. Now pair it on top of lightly buttered toast with some fresh fruit (or in my case frozen yogurt covered fruit since le boyfriend ate the rest of the fresh) and enjoy!
*I like my egg a little runny so I did it for the 60 seconds at 80% with additional 10 seconds at 70% power. It cooks the yoke a little but there is still some runny goodness. For a more solid yoke try at full power at 60 seconds.


December 29, 2011

Recipes | Black Beans and Rice

I found this budget friendly and great lunch idea from a health magazine a few years back. At first I was a little hesitant about trying it because I'm not big on black beans, but at the time I was willing to try anything that would save me money. After adding a few spices and extra veggies it became one of my favorite meal for lunch that gets me full without feeling bloated in the end.


What You'll Need:
  • Brown Rice
  • Can of Black Beans
  • Choice of Spices (I used chopped dry onion and garlic powder)
  • Can of diced tomato* or Salsa

This makes a lot so it's perfect to refrigerate and heat up for lunch during the week.
  1. Start by cooking about one cup of rice (usually yields 3-4 servings after cooked) according to instructions.
  2. Strain any extra water out and put back in the sauce pan, set burner on low and return it to the stove top. 
  3. Strain the black beans and mix into the rice.
  4. Add in your spices; I usually guess the amount, but I'd say I use about two teaspoons of dry onion and teaspoon of garlic powder.
  5. If you want to keep it simple strain the chopped tomatoes in with everything or to spice it up mix in about 1/4cup salsa. 
  6. Mix well and let sit for a minute or so until everything is warmed up.
  7. Finish with a little bit of sour cream.
  8. Enjoy!
*if you don't like pieces of tomato in your rice feel free to use tomato paste instead

LinkWithin

Related Posts Plugin for WordPress, Blogger...